Time Activities
Overview
The calculation of working time is the basis for Susan.one’s payroll calculation. In order to enter the employee’s working time, it is necessary to indicate the employee’s time activity.
An employee without inserted time activities do not participate in payroll calculation
To review current employees time activities, navigate to Employees > Time Activities. Once there, you’ll see a list view of employee’s current month activities.
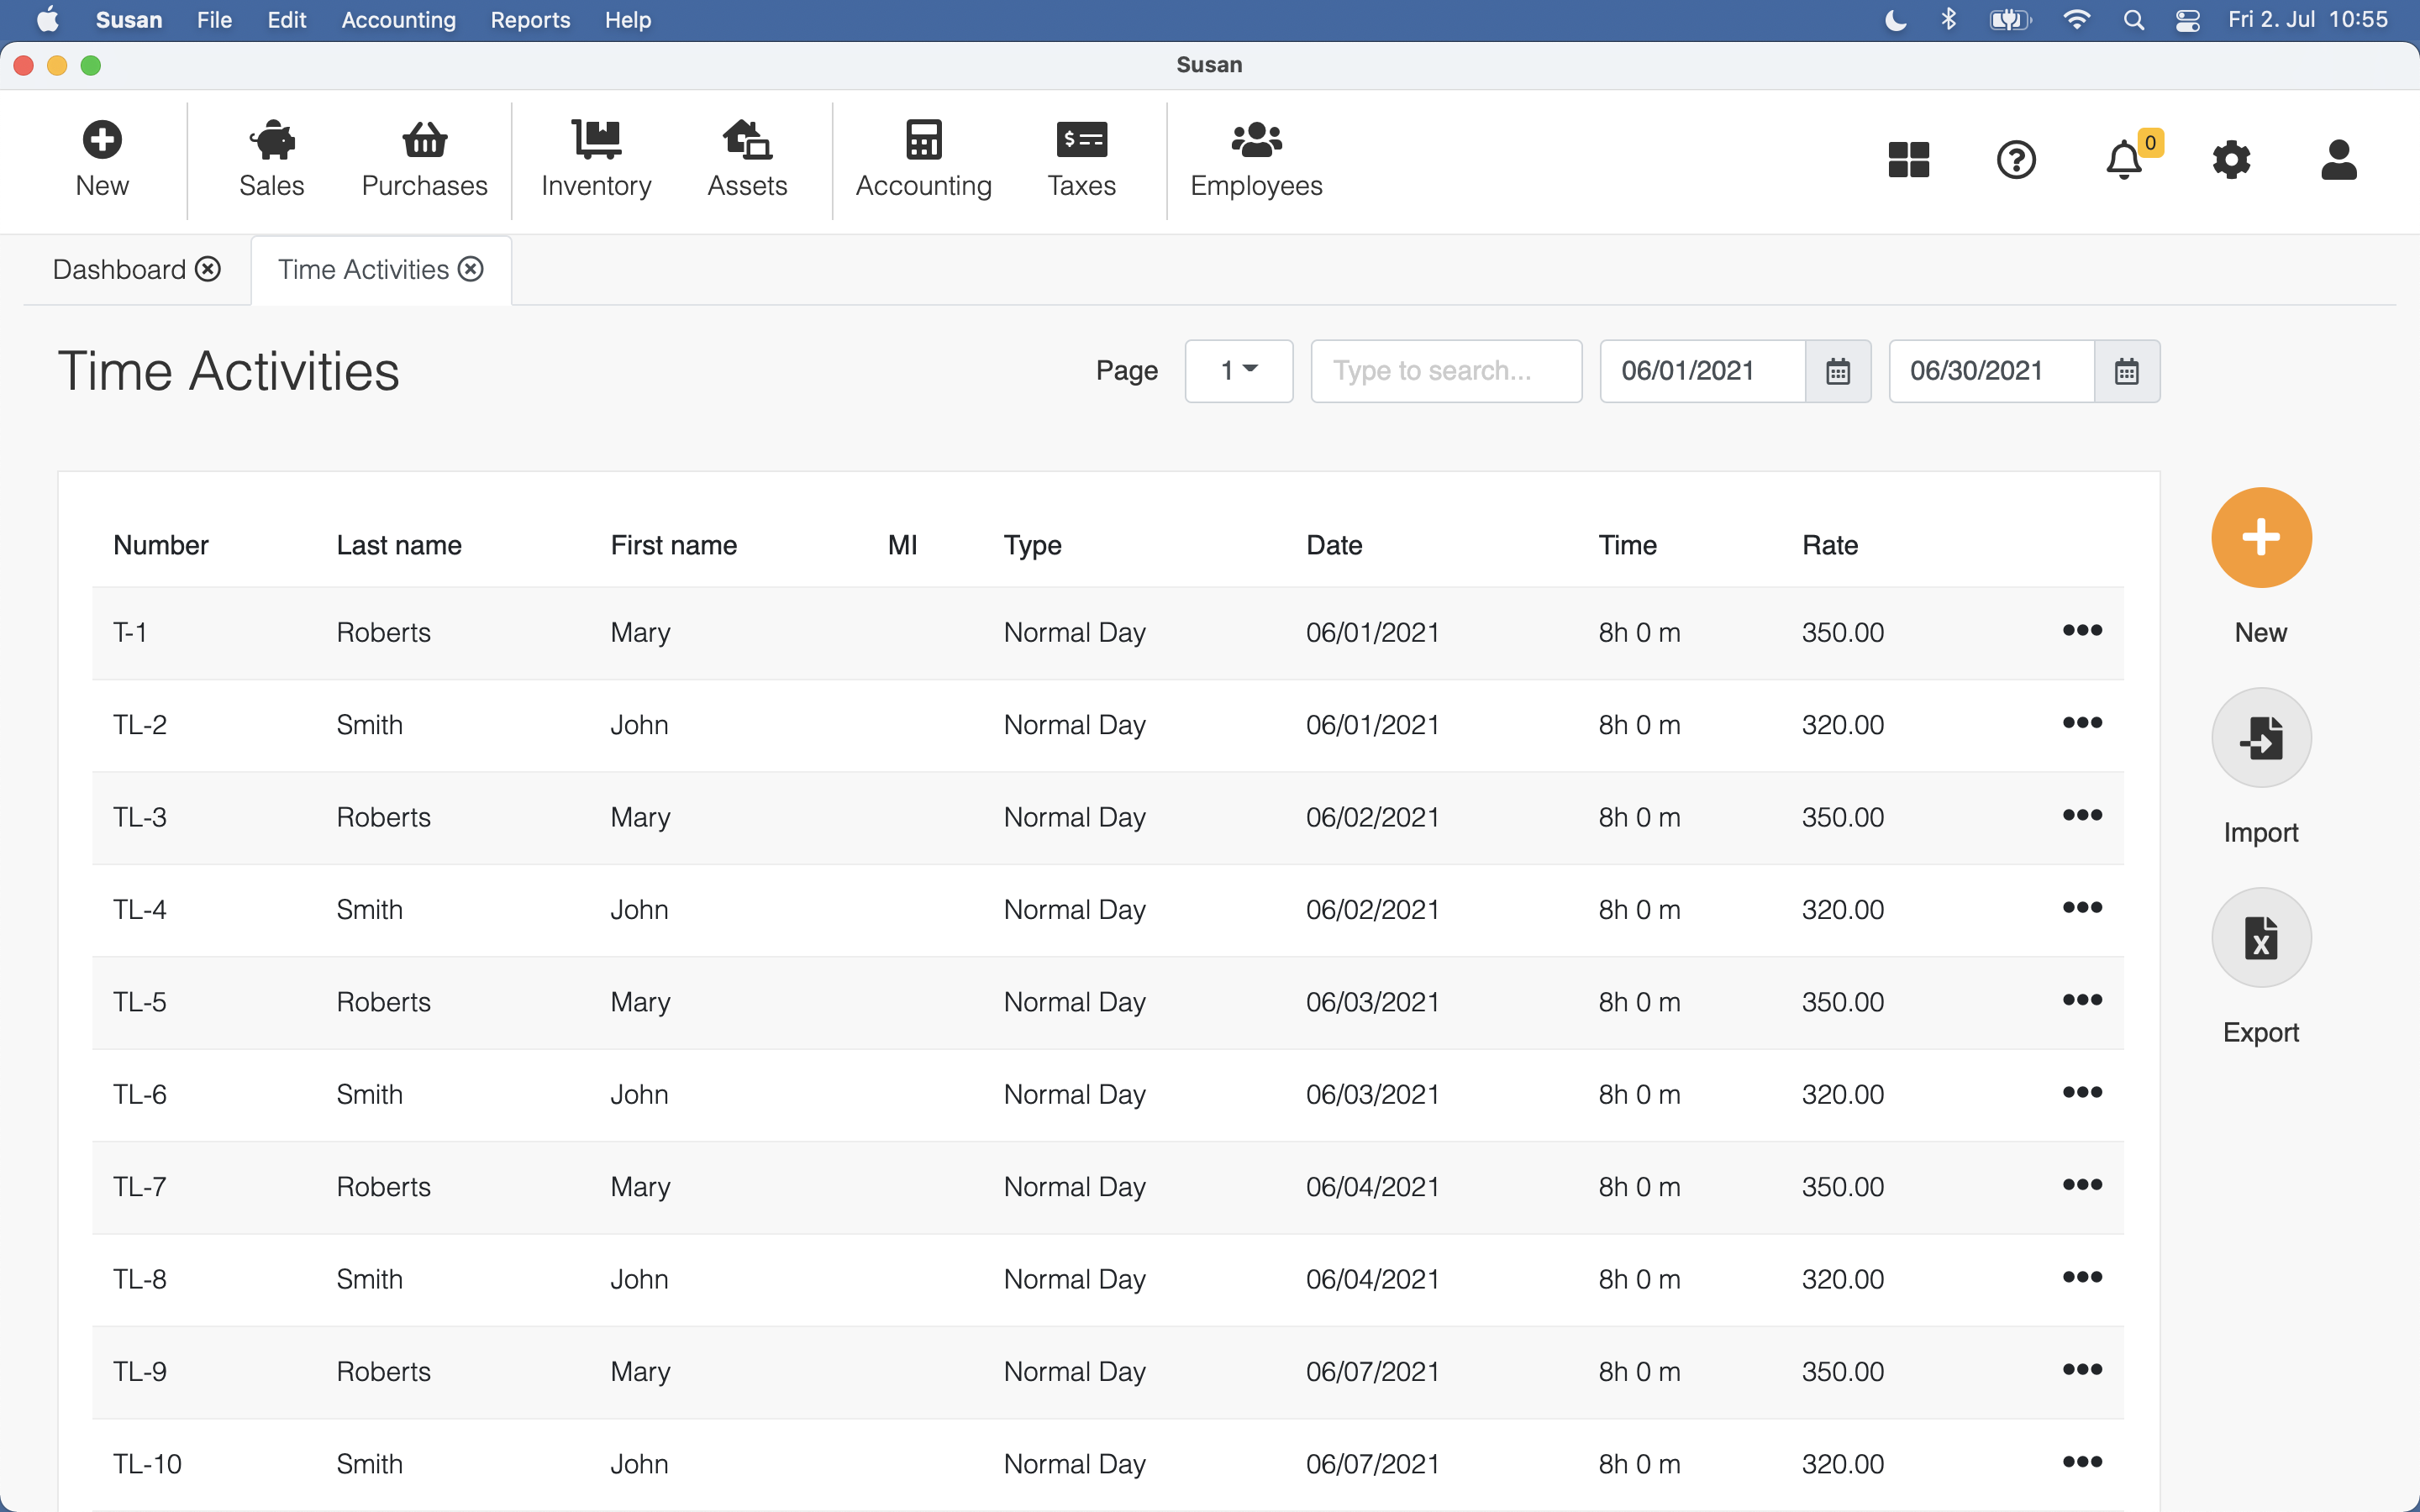
You can use the date filter to change the period of visible time activities
Inserting Time Activity
There are three ways, how you can insert time activities:
Inserting time activity manually
To add a time activity manually, follow these steps:
- Open the time activities list
- Click New
- Fill the following fields:
- employee - select the employee
- date - select the time activity day
- type - select time activity type
- hours and minutes - insert total hours and minutes of the activity
- Click Save
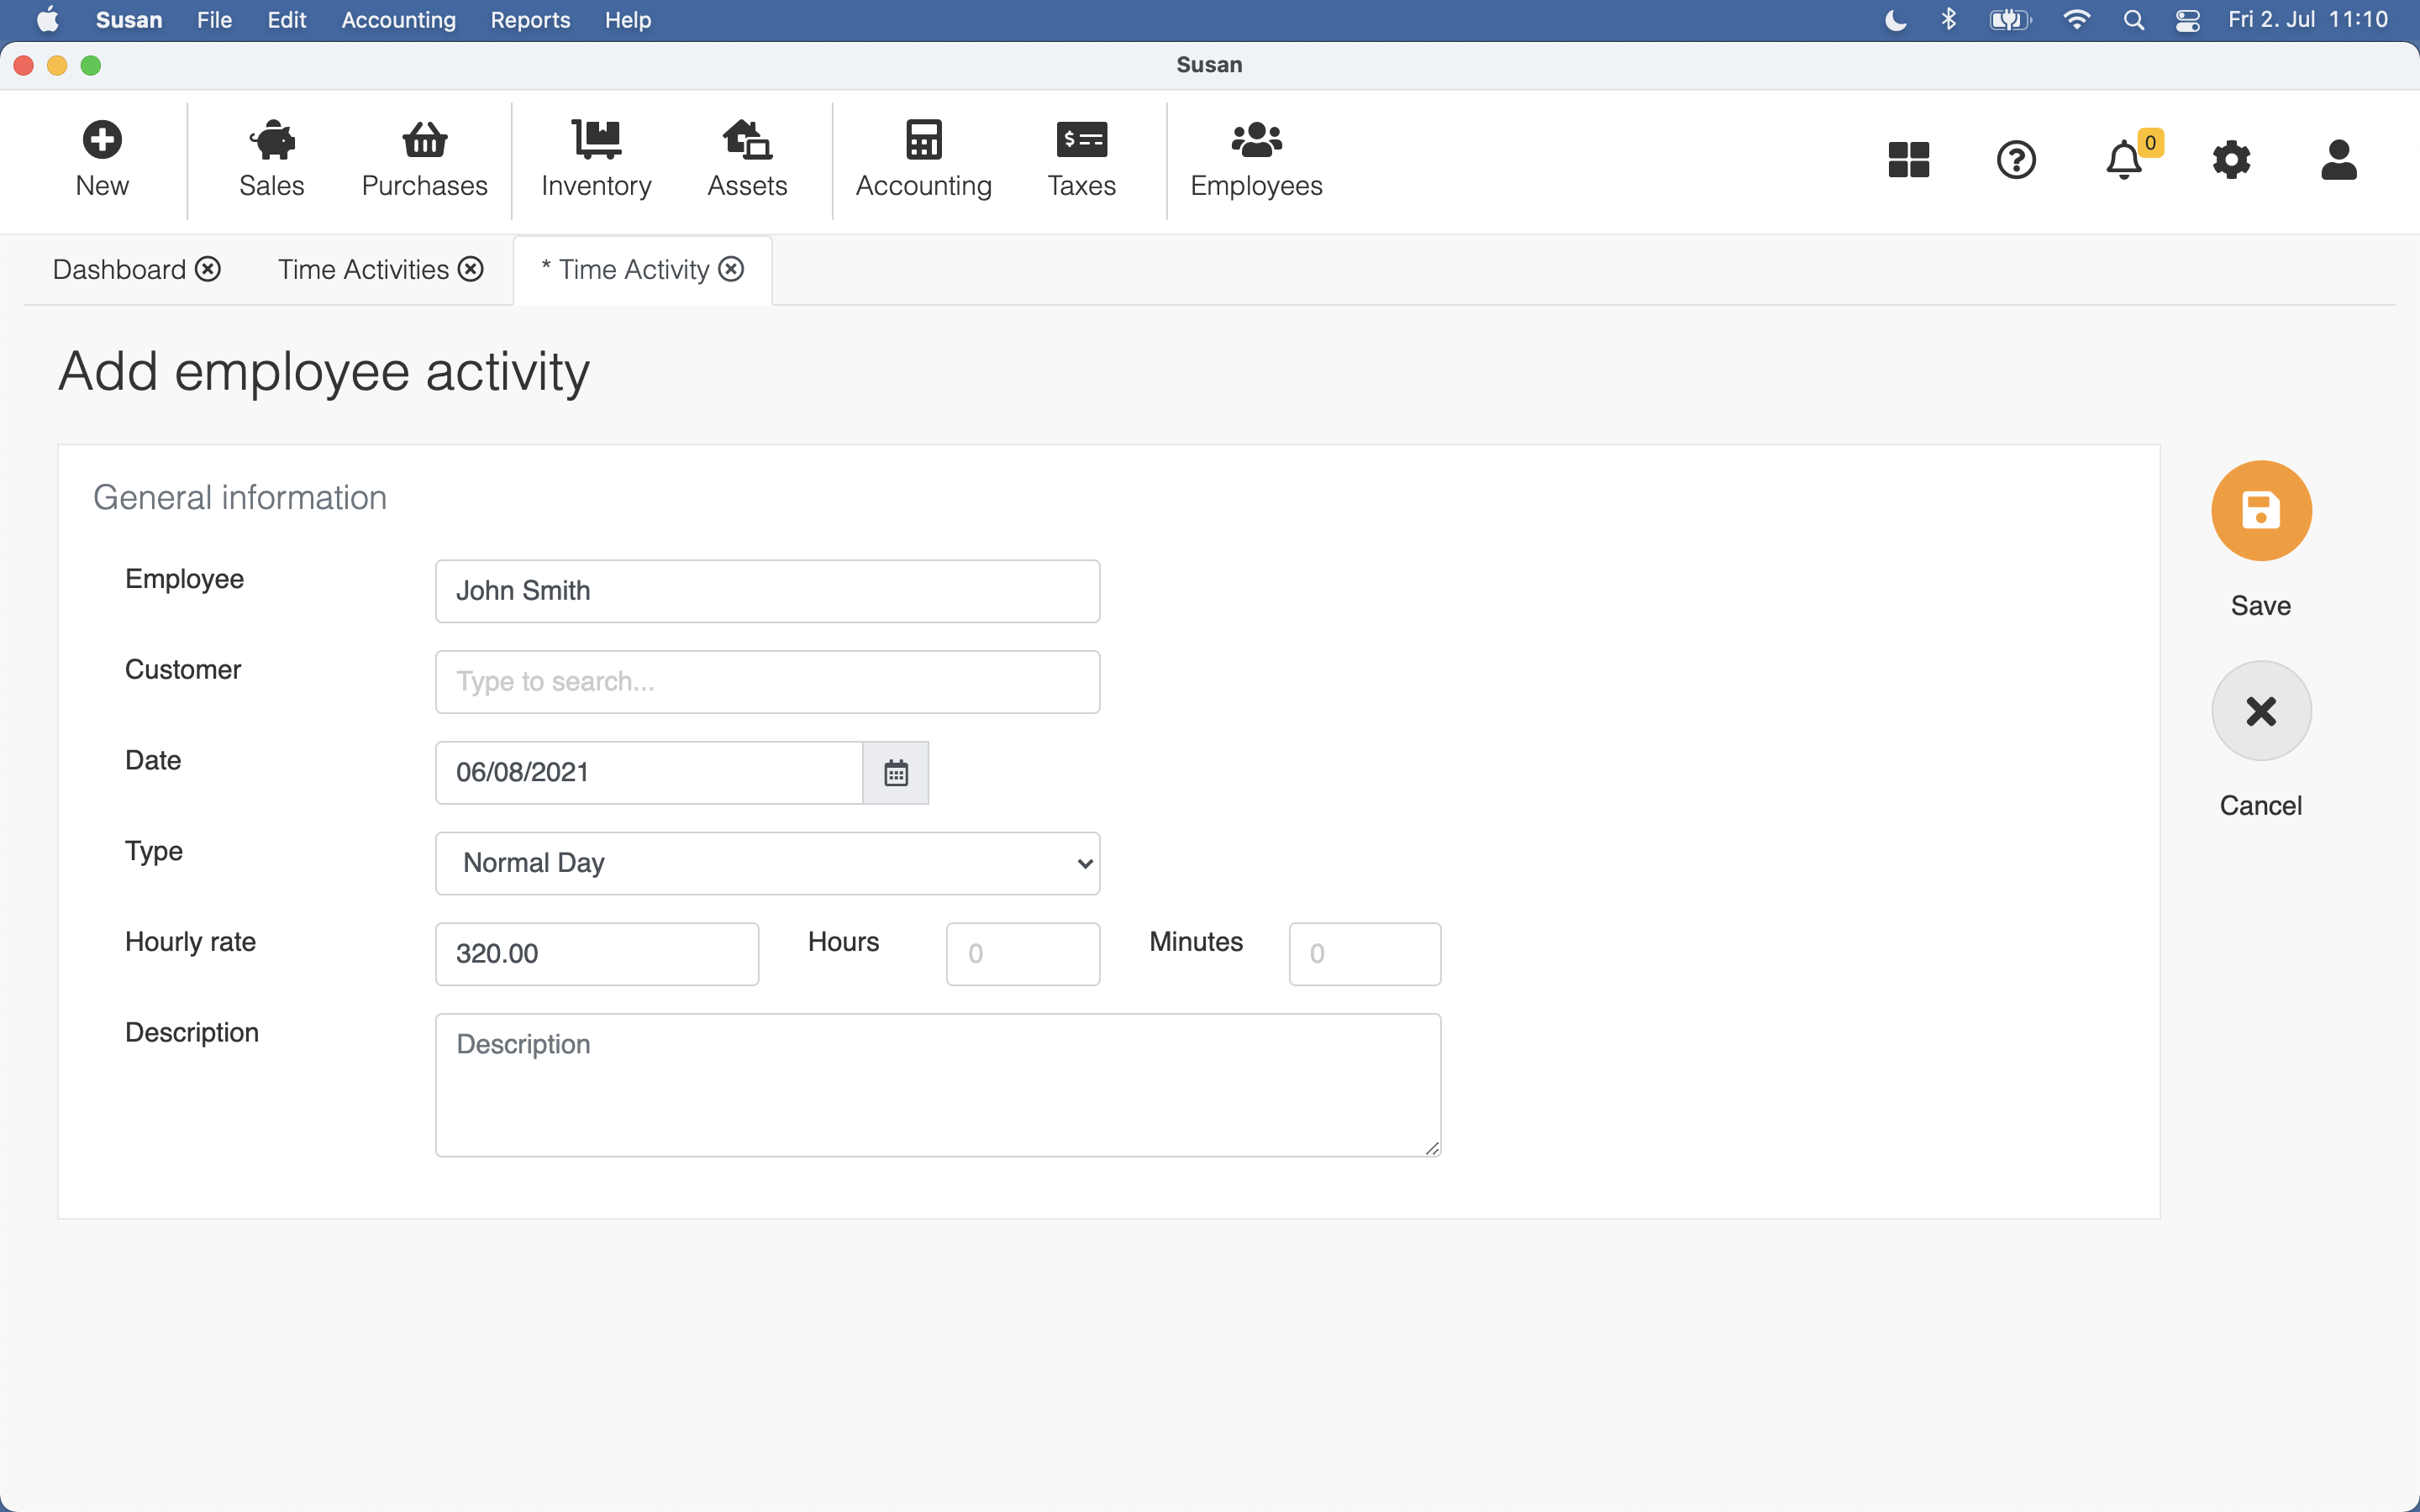
In addition, you can specify which client the employee was dealing with, which gives you an overview of the personnel costs spent for the client.
Every activity is numbered by the system with the prefix T. The L in the prefix means that the activity is unsynced with the server and not available yet in other devices
You can also change the hourly rate, by default it will be taken from the employee card.
On employees with fixed monthly salaries, hourly rate can’t be inserted and it will be calculated by the program
You can not insert time activity to employee when:
- The date of employment of the employee is greater than the date of the activity. Check the employee field hired date
- The employee has been marked as released. Check the employee field released date
- When activity hourly rate is not set on wage earners
Importing time activities from file
If you manage the time activities in another software, you can create an import file to import the activities into the Susan.one.
Supported import file type is MS-XLSX (*.xlsx) file. Data is imported only from the first sheet
Sheet example
Import file first sheet must look like following:
| Employee | Date | Regular | Overtime | Holiday | Tardy | Absent |
|---|---|---|---|---|---|---|
| ID-1 | 6/9/21 | 8 | 0 | 0 | 0 | 0 |
| ID-1 | 6/10/21 | 8 | 0 | 0 | 0 | 0 |
| ID-2 | 6/9/21 | 8 | 0 | 0 | 0 | 0 |
- employee - internal employee identificator (check the employee Identifications > Employee ID)
- date - activity date
- regular - regular hours of work
- overtime - overtime hours of work
- holiday - holiday hours of work
- tardy - hours tardy for work
- absent - hours absent from work
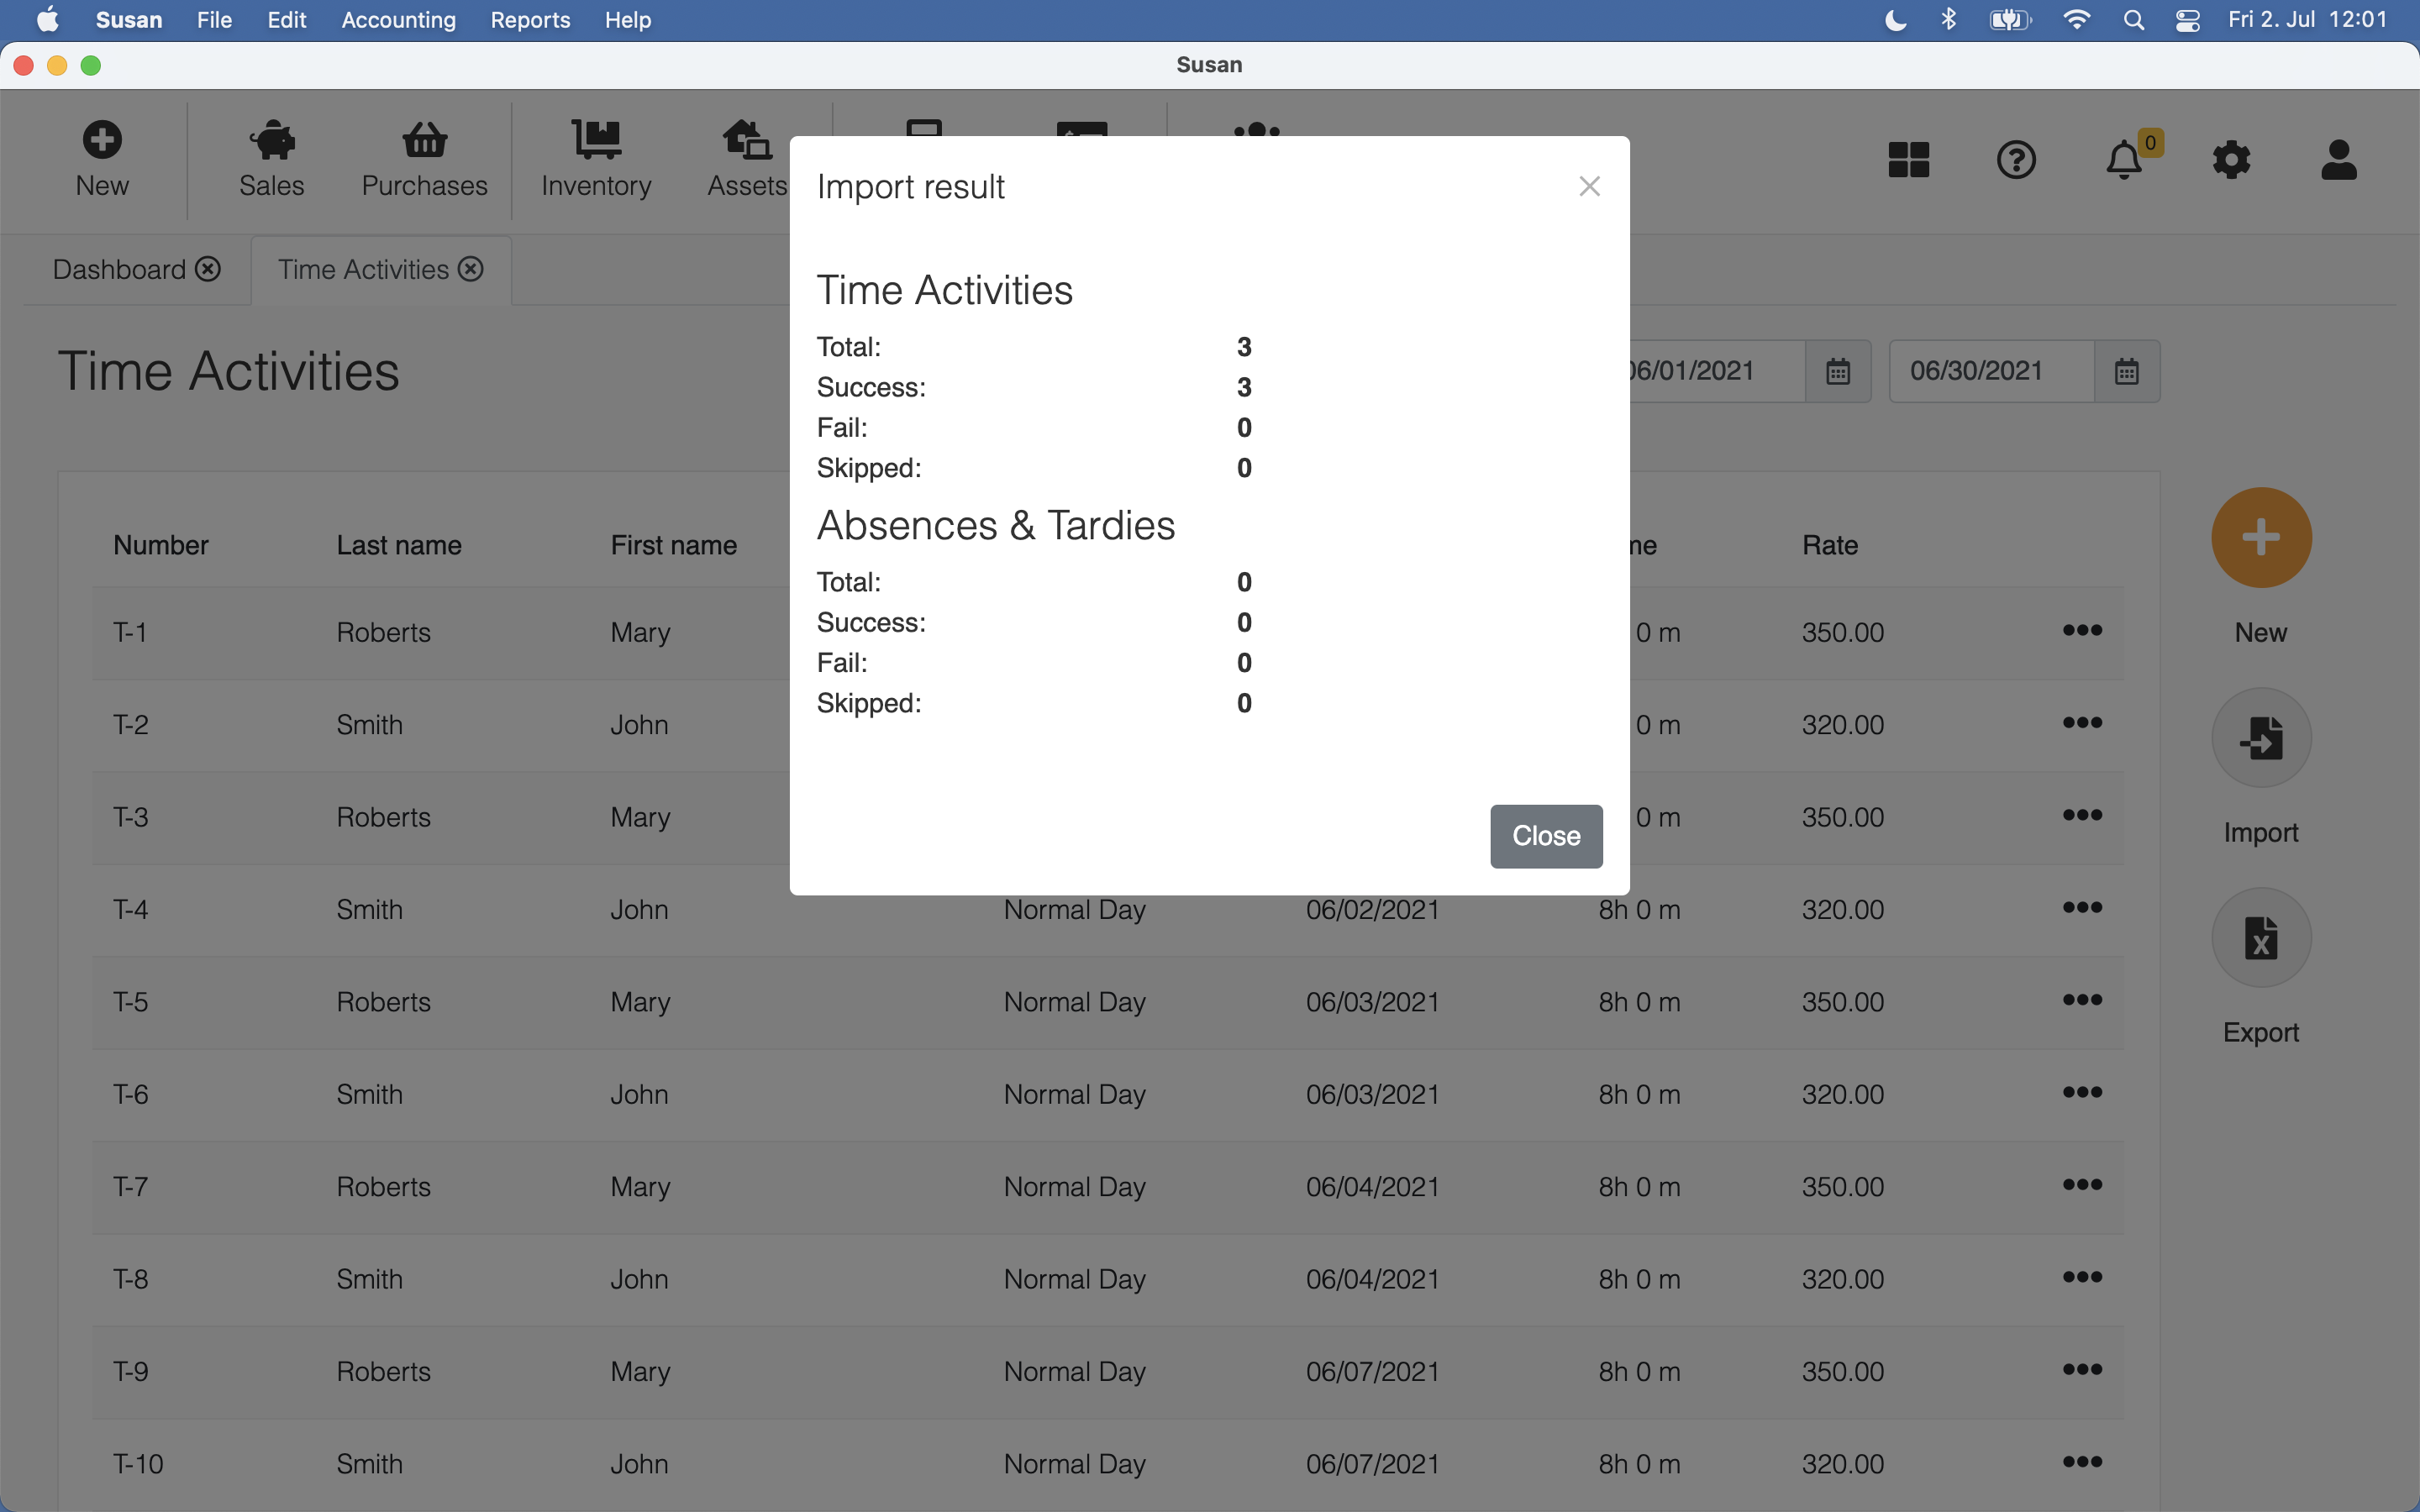
To import the time activities, follow these steps:
- Open the time activities list
- Click Import
- Select import file from your computer hard drive
- Click Import
- Click Save
Import result is displayed after the importing procedure.
Inserting weekly activity
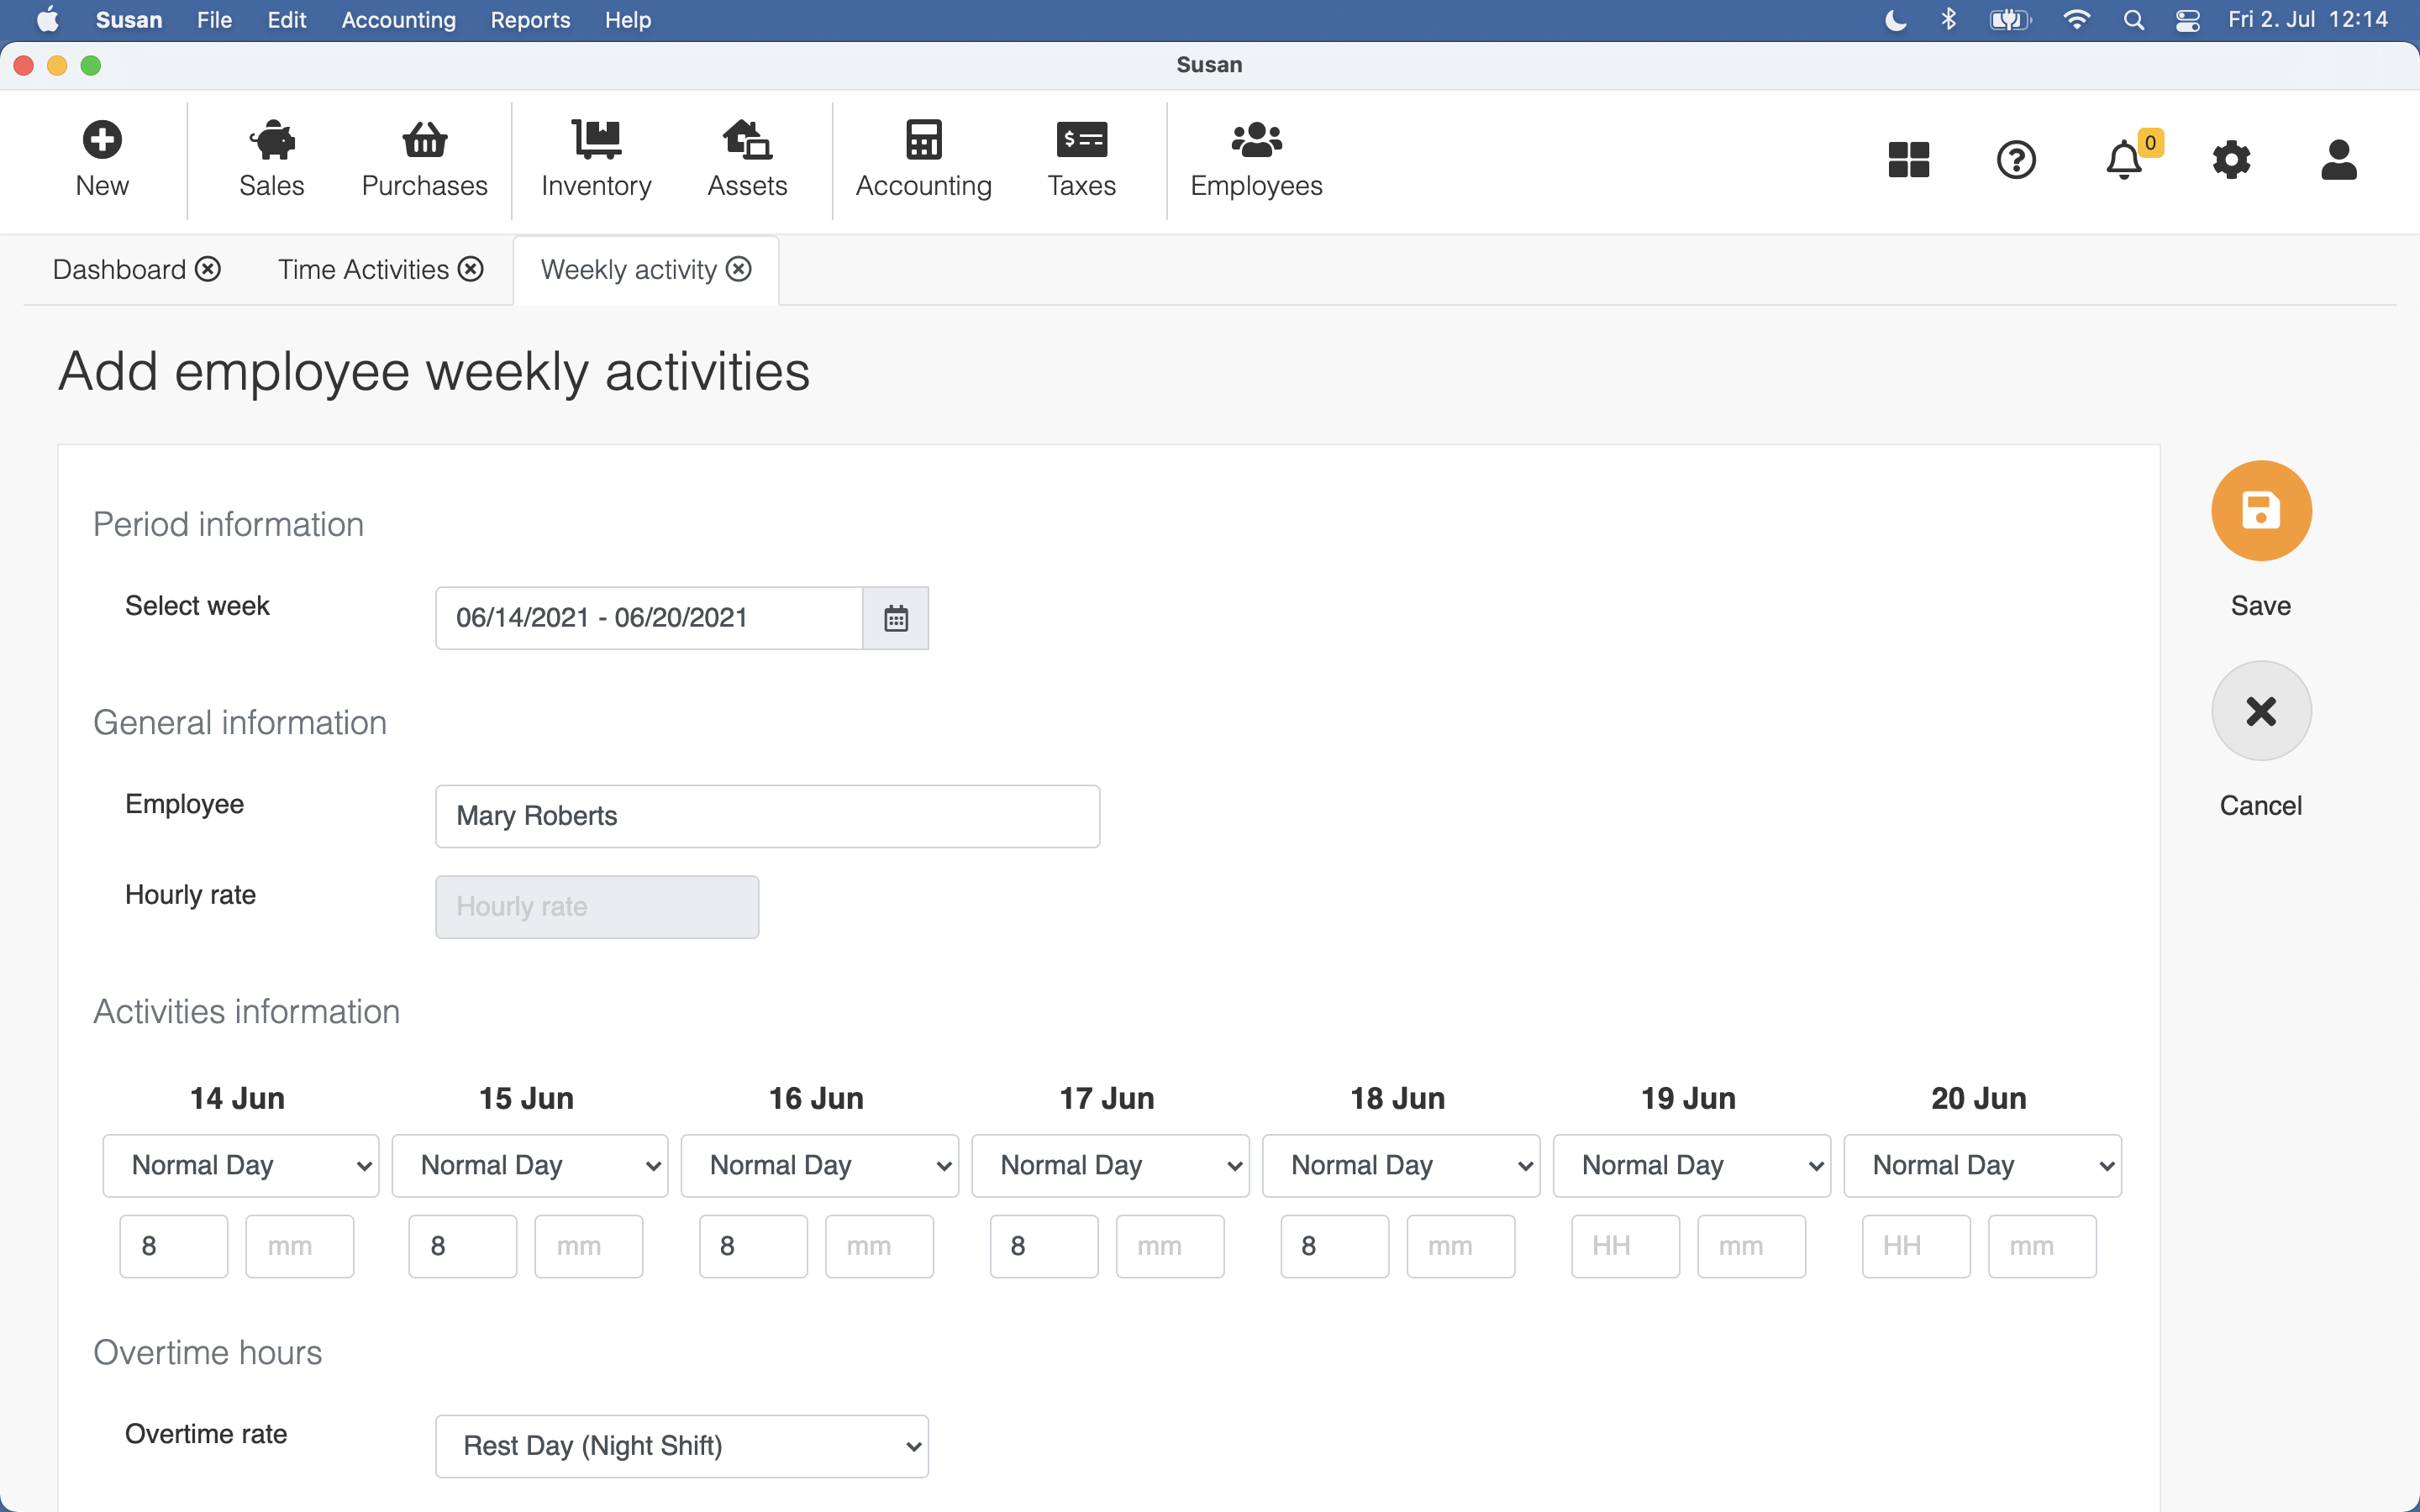
Inserting employee weekly activity is a quick way, to insert employee weekly activities at once.
To insert employee weekly activity, follow these steps:
- Click New and then click Weekly activity
- Fill the following fields:
- selected week - select the week
- employee - select the employee
- insert activity information to the week days
- Click Save
Editing Time Activity
To edit the time activity, follow these steps:
- Click on the time activity in the time activities list view
- Edit the activity data
- Click Save
Time activity used in the payroll calculation, can’t be edited
Deleting Time Activity
To delete the time activity, follow these steps:
- Click on the time activity in the time activities list view
- Click Delete
- Click Confirm on the confirmation dialog
Time activity used in the payroll calculation, can’t be deleted
Exporting Time Activities
If you need the data entered in the system to use in another application, you can export the data to a file.
To export the time activities, follow these steps:
- Open the time activities list
- Click Export
- Click Save on the confirmation dialog. Data is stored to your hard drive.